12.01.2011

Christmas time. Part 2.

It's the most wonderful time of the year!!!

 beautiful rustic angel..
the tree! (ignore the lovely blinds, specially picked for our entire street. bah humbug.)

 My $15 purchase at a little decor store called Trios.
 The white bead garland above and the red bead garland were $7 ea... I would pay it gladly again.

11.24.2011

Flaky Buttery pie crust

No matter how you say it - Pecan Pie is what's going on.

Last year I provided a recipe for Chocolate Bourbon Pecan Pie. And oh was it good! 
This year I tried a new recipe for pie crust from food network (perfectly flaky pie crust).

1 3/4 cups all-purpose flour
2 teaspoons granulated sugar
3/4 teaspoon table salt
6 tablespoons cold unsalted butter, diced
1/4 cup shortening
7 to 8 tablespoons ice water

In a large bowl, mix together flour, salt, and sugar until well combined. Using clean hands, add butter and toss until just coated. Rub butter between thumb and forefingers to incorporate into flour mixture until butter is in lima bean-sized pieces and comes together in quarter-sized clumps when squeezed in palm, about 2 minutes. Add shortening, toss until just coated in flour, then rub into flour mixture until mixture forms pea-size pieces (some big chunks should remain) and comes together in fist-sized clumps when squeezed, about 1 minute. Drizzle in half ice water and rake through mixture with fingers until just moistened. Drizzle in remaining water 1 tablespoon at a time and comb through mixture with fingers to moisten. It will go from being a shaggy mess to coming together. Dough is moist enough when it is moistened through but is not wet when pressed. (Do not overwork the dough or it will become tough.)

While rotating the bowl with 1 hand, push dough between other palm and side of bowl to gather into a ball. Turn dough onto a piece of plastic wrap, press it into a flat disk, then close in wrap. Place in coldest part of refrigerator (usually back bottom shelf) at least 30 minutes before rolling out and forming into a crust.

*If your pie filling does not require being in the oven for over 30 minutes, bake pie crust for 5-10 minutes at 325 first and then add filling.

11.21.2011

Christmas time. Part 1.

One of the most exciting things of moving (only 5 times) is the Christmas totes you packed up 2 years ago can finally be opened revealing wonderful treasures you may have forgotten about.

I fashioned these beautiful ornament hangars - because after seeing similar ones for an outrageous price - you realize you can make your own customized ones for less! Anyway, I spotted them in my desk when it was moved in June. I was so excited to use them this year.
Love them!
And of course one of the ornaments from the German Christmas market! 

11.20.2011

Crochet projects!

I've had a little fun with learning crocheting. It has had it's ups and downs. The downs are pulling out rows that I did wrong or had to redo because I got the stitches in the wrong place.
Anyway, this was my first hat! Fits the head of a precious and energetic 3 year old.
 For the head of the 3 year old's baby brother coming in March! (Used a loom for a looser knit.) 
First blanket! also for baby brother.
The pictures don't tell all -but they match! It's the same green yarn on all of them.

11.12.2011

it's a "in-progress" kind of month.

I've been piling on the projects this month.
I've had my bookshelf out on my front step for so many days these past few weeks. It's had some dreadful days too. I am eternally optimistic about my projects but I get part way through and something makes it difficult and then I'm at the point that I don't want to deal with it. ever. 
I've spent several days with spray paint everywhere working on small projects, which are now drying. and hopefully done. yes!
But I do have a finished project to show you!

Day 1: Got wall art
Day 2: Got frames.
Day 3: Got them put together and on the wall.

Wall art: $10 (Dillons! Surprised?)
Frames: $12 (Wal-mart. Recycled.)
Next week, get the bed raised 4 inches or so and get the bookshelf off my front step.

10.25.2011

paper cupcake world.

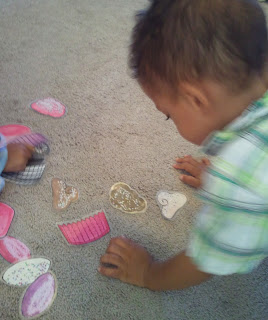
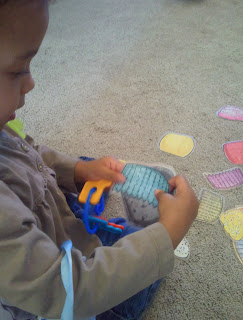
somehow I stumbled upon this website for build your own cupcakes. What a fun idea! Put together your own cupcake, mess-free?!? What could be better? I printed off the set on card-stock and grabbed some contact paper to laminate them so they could be more indestructible. The kids played with them, I think we spent more time practicing colors and new words then actually decorating our cakes.

My other suggestions are:
 Girls Party Art!
1. Print off a few extras so the girls can chose their favorites. 
2. Buy simple frames at the dollar store.
3. Cut down the card stock to the size of the picture frames.
4. Girls can glue on the favorites. Extra accessories and swirls could be added with markers.

....and If you have a sleep-over maybe have the girls pick out pinks, purples, whatever- spray paint for their frames and have dad fix those up after bedtime to allow time to dry. In the morning put them together and send it home!

Mother's Day!
1. Print off enough for your sunday school class, daycare, etc.
2. Bring extra cardstock, glue and crayons/markers.
3. Fold the extra cardstock to make cards.
4. Kids can glue on the cupcake items of their choosing.
5. Help them write a little note inside for mommy.

get the 'make your own cupcakes' pdf here: cupcake files!

10.20.2011

Cleaning!

I despise cleaning despite what people say especially those that I housecleaned for once upon a time. But it needs done. Most of the time it seems that all I am doing is moving totes and boxes from room to room. For instance, this room, the second bedroom, was full of totes and boxes for several months...

And now it looks like this!
Very bland but it's temporary living for my sister and eventually guests.
On the shopping list for this room:
Window treatments.
Bedside lamp and table.
Wall art.


Shopping trip here I come!